The Yogurt You Want and the Plastic You Don’t
The Yogurt You Want and the Plastic You Don’t
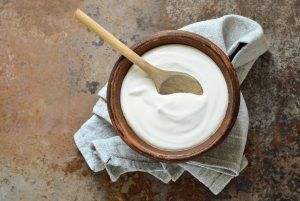
Yogurt is a delicious and nutritious food, eaten the world over for breakfast, lunch, dinner, and snacks. It’s appreciated for being rich in calcium, protein, and probiotics, while not high in calories. However, new studies have identified a modern life reason to love this more than 7,000-year-old food. Scientists have found that the probiotics in yogurt provide a line of defense against the damage associated with plastics in our digestive systems. It’s the yogurt you want and the plastic you don’t.
Not a Good Thing
Microplastics have been found in human blood, brains, lungs, and elsewhere. Studies have shown that nanoplastics enter our blood and organs and cross into our gastrointestinal tracts. While there are limited studies about the full effect of plastic in our gut and the problems it causes, it’s clearly not a good thing.
Those microplastics are getting into our system from the food we eat, the water we drink, and the air we breathe. That’s regardless of where you live or how old you are. With 400 million tons of plastic waste being created globally each year, it’s clear that we’re all exposed. And this is a real problem.
Fight Back
While the probiotics found in yogurt and other fermented foods won’t completely solve the situation, they’re a tasty, healthy way to equip your body to fight back.
Of course, we all know that unflavored, unsweetened organic yogurt is your best bet, free from sugars and other fillers. But did you know that yogurt is amazingly simple to make? It also tastes great and is cheaper than store bought. Here’s how to make your own.
Recipe
Ingredients:
- ½ gallon of organic milk (The fat content of your milk will be reflected in the thickness of your yogurt. However, you can experiment by adding dried milk powder into your milk to increase thickness if you want to use 2% fat milk.)
- ½ cup of organic, plain (not flavored) regular or Greek yogurt containing active yogurt cultures*
*Make sure that your “starter” yogurt contains active yogurt cultures as stated on the label.
Directions:
Pour the milk into a Dutch oven and heat over a low heat. Don’t let the milk boil. Constantly stir or whisk to avoid scorching the bottom of the pot. If you have a candy thermometer, you’re looking for approximately 200 degrees.
Then remove the pot from the heat and let it cool to the touch or to a temperature of roughly 115 degrees.
In a separate bowl, place your yogurt and slowly whisk in 1 cup of the cooled milk into the yogurt until fully incorporated. Add this mixture into the Dutch oven, gently stirring until incorporated.
Cover the pot with the lid and place it in your oven with the light on for warmth. You can also wrap a couple of towels around the pot to keep it warm while the mixture sets.
The longer the yogurt sets, the thicker and more tangy it will be. Other factors include the starter yogurt you are working with and the exact temperatures of the yogurt.
Until you have made enough to know exactly how long you like your yogurt to set, start checking for consistency and flavor at 4 hours. Don’t actually stir the yogurt before it has finished setting.
Once set to your liking, remove the pot from the oven, drain off any excess liquid from the top or stir it back into the yogurt for added smoothness. Then scoop into containers with lids and refrigerate for up to two weeks. If you prefer the consistency of Greek yogurt, drain off the excess liquid from the top and then strain your yogurt through a cheesecloth to remove any additional liquid.
After you’ve made your first batch of yogurt, you can then use some of your homemade yogurt as a starter for the next batch that you make.
Use this homemade yogurt in cooking, baking, smoothies, or eat it straight out of the fridge. Take that microplastics!
- SHARE THIS POST


