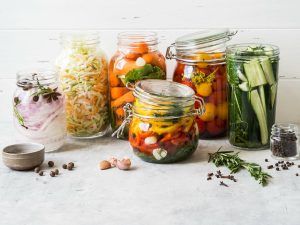
Pickling Made Easy
Pickling Made Easy
Whether your garden is overflowing this year, or you just love all things crisp and briny – pickling is the answer. What keeps most people away from pickling is the thought of bushels of vegetables, pots of boiling water, and hours of precise preparation. That’s yesterday’s pickling. Welcome to today’s pickling made easy.
Just about any vegetable can be pickled quickly. They’re literally called “quick pickles” or “refrigerator pickles.” The process involves making a basic brine of vinegar, water, and salt and storing the brine soaked vegetables in the refrigerator.
While these quick pickles don’t develop the same depth of flavor that fermented vegetables do, they are a lot quicker to make, easier, and full of flavor.
Preparation
First, pick your vegetables. Just about any vegetable can be used so long as it is very fresh and bruise free.
If it’s a vegetable you prefer peeled, like a carrot, then peel them. Then, choose your shape. Coin shaped, spears, matchsticks – your call. Smaller vegetables like mushrooms and cherry tomatoes are best preserved whole.
If you are using green vegetables such as green beans you might want to blanch them for 2 minutes in boiling water then plunge in an ice bath before they are ready for the brine. This is purely cosmetic as it will allow them to keep their vibrant green color during the brining process. In terms of taste, it’s a completely optional step.
Otherwise, blanching is something you can choose to do if you want to take the crispness of a vegetable – like carrots for instance – down a notch. Blanching isn’t appropriate for more delicate vegetables like cucumbers.
The Brine
When it comes to quick pickles, the basic brine is 50/50 vinegar and water. Depending on your taste and the vinegar you are using, you can alter the ratio as you experiment.
When choosing a vinegar stay away from aged or concentrated vinegars and go with more basic white, apple cider, rice vinegar, or white wine. Red wine is a good choice as well. Just be aware that it will turn your vegetables pink!
Once you’ve got your base, you can customize your pickles with any combination of herbs and spices you like. For traditional dill pickles you would want to add garlic, dill seed, and maybe some red pepper flakes. However, if you want to go crazy and try different combinations on your way to creating your own special recipe, consider potential add-ins such as:
- Peppercorns
- Thyme
- Rosemary
- Oregano
- Ginger
- Smoked Paprika (also adds color)
- Turmeric (also adds color)
- Almost anything in your spice rack!
Consider experimenting with fresh and dried herbs, sliced garlic and smashed, whole spices and ground.
Sugar and Salt
A word of caution. While you may have had pickles with sweetness, odds are they weren’t quick pickles. When it comes to a quick pickle brine, think salty not sweet. If you do want to experiment with sugar, use it sparingly to start. For salt, the general rule of thumb is 1 tablespoon of kosher salt or 2 teaspoons of pickling salt for every pound of vegetables.
Combinations
For the beginner it is always best to brine each vegetable separately. Onions, for example, brine quite quickly. Red onions will bleed and turn your other vegetables pink. Brining everything on its own avoids a lot of potential problems!
The Process
- Select your heat-proof jars. Pint-sized Mason or pickling jars with wide mouths are best. Make sure they are clean and dry.
- Wash, dry, and cut your vegetables into the desired sizes.
- Put whatever herbs, spices, or garlic you are using into the jars.
- Tightly pack your jars with your cut vegetables, leaving ½ inch from the rim of the jar to the top of your vegetables.
- Mix your brine ingredients and bring to a boil. Be sure you are making enough brine for your jars. It’s better to have too much than not enough. Be sure any salt (and sugar if using) is dissolved. Remove from heat and pour into your jars leaving the ½ inch space from the rim of the jar.
- Tap the jars to remove any air bubbles and add more brine if necessary.
- Once the jars are cool, pop them into the refrigerator. Some people enjoy their pickles after an hour chilling. Others won’t taste their pickles until 48 hours have passed. The only way to tell is to give them a try. Some pickles will be perfect, others might be better with more time. Any pickle will become more tender and develop a stronger flavor over time. However, be careful. Too much time and they will become limp and vinegary.
Pickles are the perfect healthy addition to barbecues, crudités platters, and alongside or in a sandwich. Enjoy!
- SHARE THIS POST


