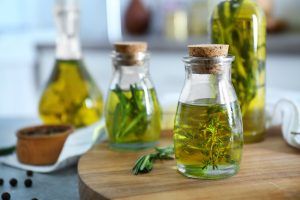
Make Your Own Infused Olive Oil
Make Your Own Infused Olive Oil
Quality olive oil is delicious as is. It’s also so healthy it’s a staple in the several of the Blue Zone diets. So why mess with a good thing? Because you can actually make it even better. The ones you find in the store aren’t always the quality you want, yet they can be extremely expensive. In just a a few minutes – literally – you can make your own infused olive oil at home. In addition to being a great addition to any meal, it’s the perfect hostess gift, or gift for any foodie friend. Let’s get started!
There are two ways to make infused oils, hot infused and cold infused. The method you use depends on the ingredients you’re working with. While technically any oil can be infused, we recommend using olive oil. Not only does it offer the most health benefits, but it’s flavor profile is more sweet and lends itself to many different infusion flavors.
Cold Infused
Cold infusion is just what it says – no heat involved. It is the method of choice for small or delicate ingredients – think peppercorns and fresh herbs. You’ll want to use a food processor to pulverize your ingredients. A good rule of thumb regardless of your method of infusion is to use one cup of loosely packed herbs to every quart of oil. However, some ingredients, like fresh rosemary, will be stronger than parsley, so you’ll want to use more or less according to the ingredient and your personal tastes. Once pulverized, mix the paste with the oil. As soon as the mixture has been fully incorporated, you can strain out the solids. Don’t worry, there is no need to let the mixture sit for a long period of time. Once strained place the oil in an airtight container, preferably glass. It is important to refrigerate all cold infused oils. Generally speaking, cold infused oils will last one week in the refrigerator.
Heat Infused
Heat infused is the preferred method if you are using sturdier ingredients such as dried or preserved items – think chiles, mushrooms, garlic, and woodier herbs such as thyme and sage. The oil should be heated slowly to a temperature of no more than 150 degrees. If the oil gets too hot it will change the taste of the oil and possibly turn it rancid. We’re not cooking here, we’re infusing, so the lower temperature is key. Once the oil reaches the desired temperature remove it from the heat, add your ingredients, cover, and let the mixture steep. Heat infused oil does not need to be refrigerated, however, know that the longer the oil sits the stronger the flavor will be. While the infusion ingredients don’t need to be removed when the oil is heat infused, they won’t look as fresh and nice after the first week.
Get Crazy
The sky is the limit when it comes to the flavored oils you can create. It’s fun to get a little crazy by trying different combinations. If you aren’t sure if you’ll love them, just make a test batch to start. Here are some of the unlimited possibilities:
- Mint and lemongrass
- Rosemary and garlic
- Ginger, garlic, and lemongrass
- Fresh bay leaves
- Oregano, garlic, and dried tomatoes (pizza flavored)
- Orange, lemon, and lime
- Cilantro and serrano chiles
- Chili
- Cinnamon
- Roasted Red Pepper and Basil
- Vanilla
- Truffles
The list is endless.
The Proof is in the Eating
That’s it. You’ve just infused your first batch of oil. Now comes the fun part – eating! Here are just a few ways you might not have thought of to enjoy your new treat! Drizzle over:
- Fresh bread
- Crostini with cheese
- Cooked veggies
- Grilled meats, fish, and poultry
- Baked potatoes
- Popcorn
- Mayonnaise and other condiments or dressings – incorporate into
- Fruit salad
- Rice
- SHARE THIS POST


